The following steps will guide you through setting up users with wire capability.
Adding a new user
Note: if your user is already set up, please select the pencil icon to the right of the user and click on "Assign Rights" to edit the user's rights (then proceed to step 2).
Add user:
-
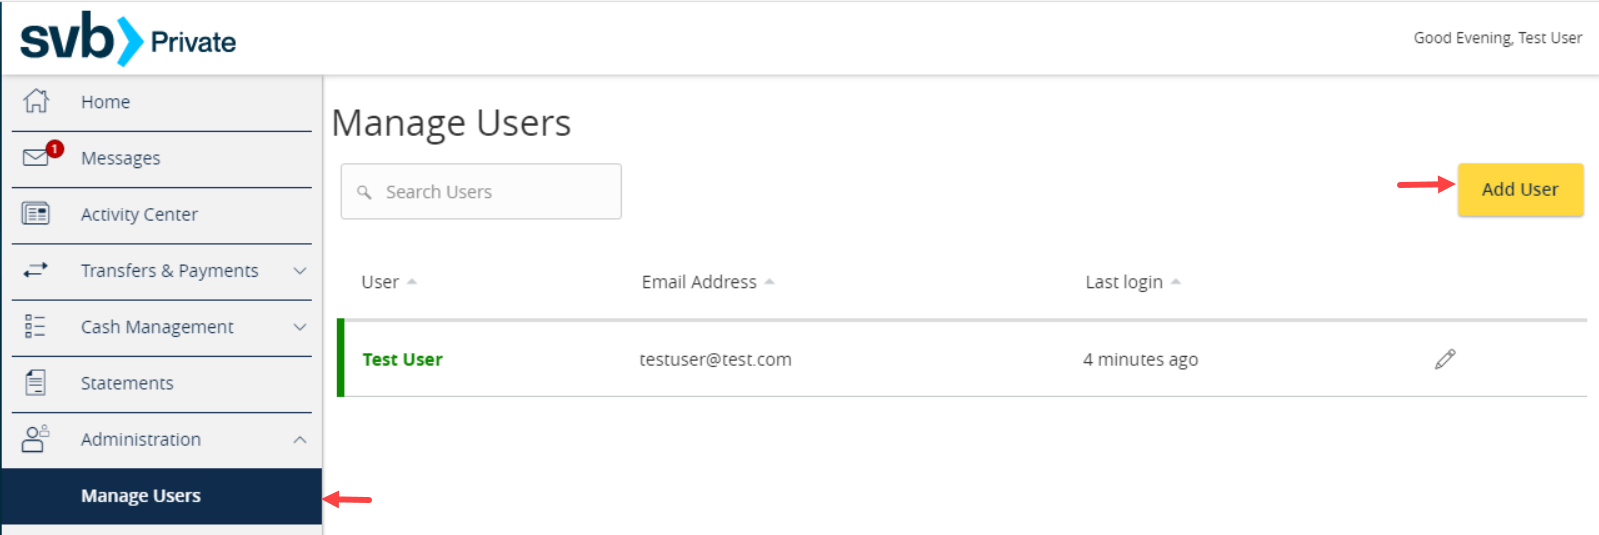
- From the left menu bar select Administration and then Manage Users.
- Click the Add User button located on the top right side of the screen.
-
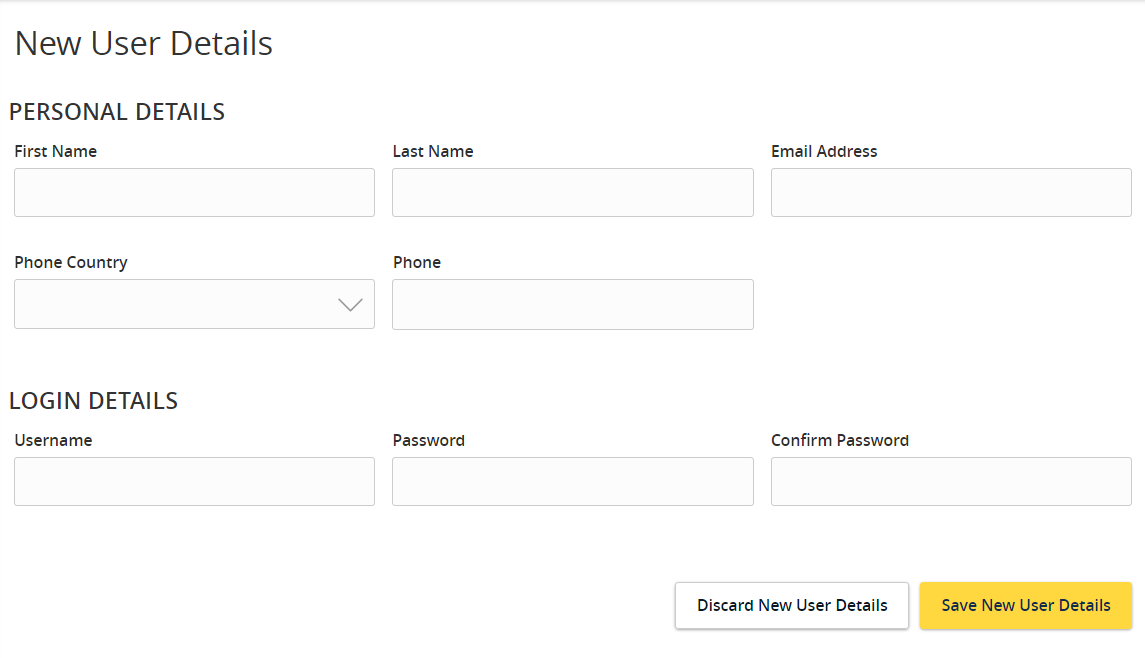
User details
In this section, the user's details and contact information are entered, along with their designated logon credentials.
Personal Details:- First and Last Name*
- Email Address*
- Phone Country**
- Phone Number *
Login Details:
- Username*
- Password & Confirmation Password*
Note: User will be prompted to change the password during their initial login session.
Additional Authentication Required:
A secure access code is required to authorize this transaction. Please select your delivery method to receive your secure access code.
- Enter your Secure Access Code and Verify.
- Save user
- The User has been saved
*Required fields
**US Carrier phone number is required for Business Bill Pay enrollments
-
Assign rights
In this section the rights to Domestic and International wires can be assigned. Limits for these transaction types can also be set up as applicable to each user. It takes two users to complete a wire, one to draft and another to approve. Users may be assigned both draft and approval rights but they can't approve a wire they have drafted themselves.
Click on the transaction type to configure the user’s entitlements and limits.
- Domestic Wire - Access to Domestic Wires, including options to draft, approve and cancel wires.
- International Wire - Access to International Wires, including options to draft, approve and cancel wires.
The Transaction type is enabled by toggling the on/off check marks in the upper right corner.
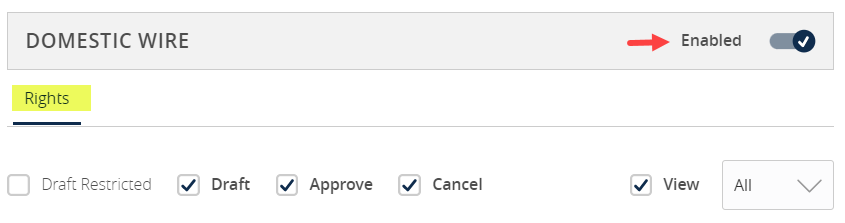
On the Rights tab select the designated Operational options.
- Draft Restricted: user can only initiate wires using templates
- Draft: user can schedule a wire for approval to process
- Approve: user can approve wires scheduled by other users
- Cancel: user can cancel wires
Users with Approve access will need to download the Symantec VIP Access token. To learn more about downloading and activating the token, please click here Digital Banking Soft Tokens.
Click on the icon next to View rights option to establish the necessary view rights for digital banking originated transactions posted on the Digital Banking Activity Center screen. Important: users who will be approving wires must have a View capability either for All so they can see wires other users have drafted, or Account so they can view any transactions for accounts they have access to.- All: user can view all wires created by all digital banking company users
- Account: user can only view wires for accounts user has access to view
- Own: can only view own wires
- None: user cannot view any wires

Limits:
Enter the user’s transaction dollar and count limits. The Per Transaction limit is noted on the designated transaction type.
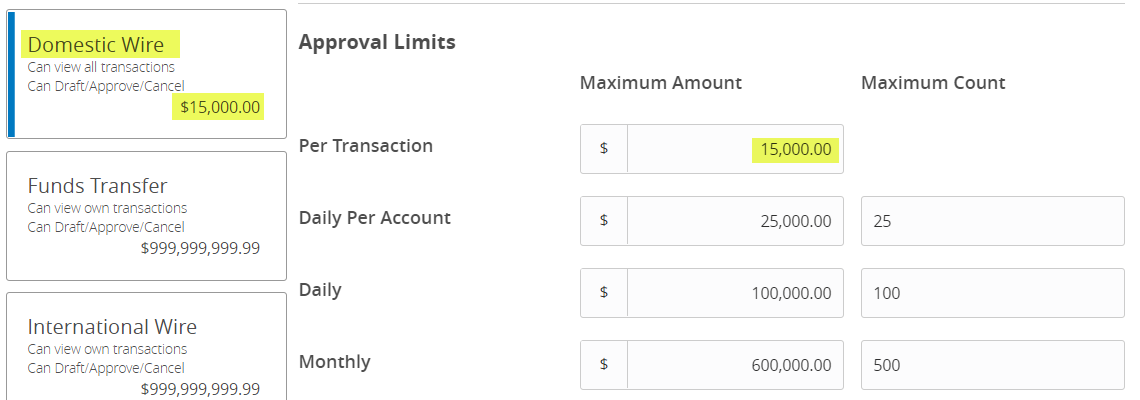
After options have been selected on the transactions tab, click Save in the upper right corner. If the user will be accessing both Domestic and International transactions, be sure to complete the selections for both types of transactions.
Features:Highlighted below are the features specific to wire entitlements. After making selections, click Save.
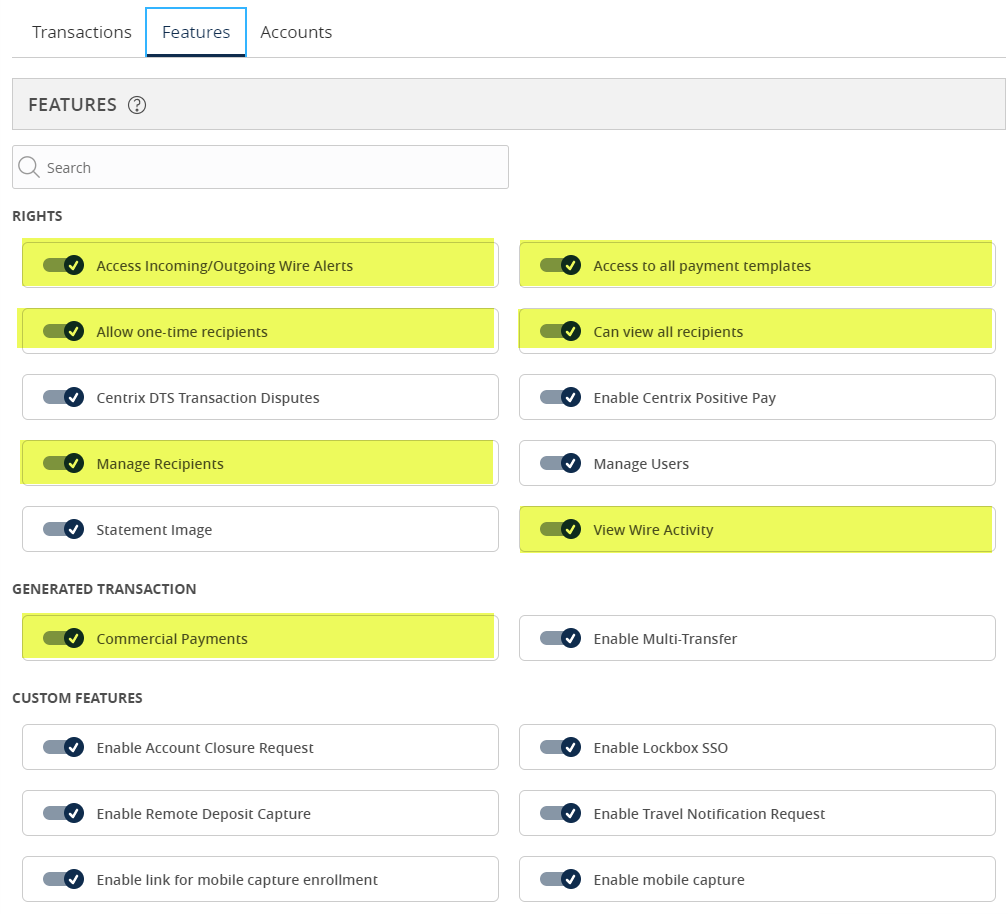
Feature Descriptions: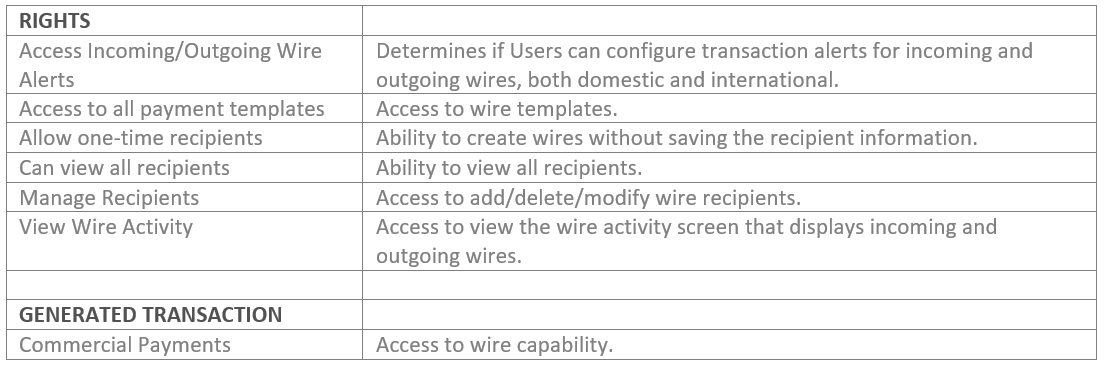
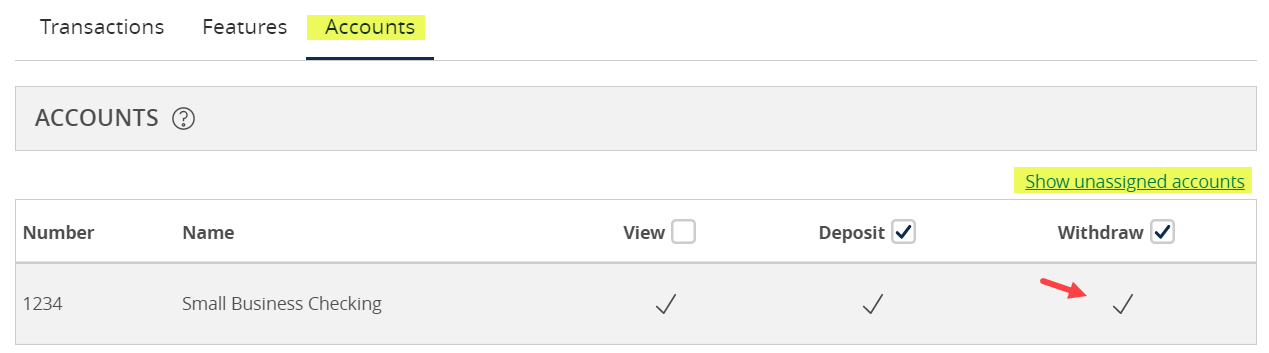
Accounts:
Designate the user’s Account Rights.
- Circle forward slash symbol: Access is disabled, but can be enabled
- Check mark symbol: Access is enabled
The account must have Withdraw access for a user to draft or approve wires from it. Select Show/Hide unassigned accounts to make additional selections (if applicable). Select the Save button to record the setup.
For information regarding sending wires, please click here Sending wires in the Business Client Edition.