Wires may have special instructions that include information such as FFC (for further credit to), invoice numbers, or brokerage accounts. Digital banking is well equipped to handle these types of transactions. The most efficient way for sending wires with special instructions is to save the wire recipient and then create a template for that recipient that includes the special instructions. This allows you to quickly send a wire to the recipient with the special instructions as well as easily update the template if the special instructions change.
You should first obtain the wiring instructions of the receiving institution(s) then follow the below steps:
Step 1: Set up a Recipient by selecting “Recipient List” under the Transfers & Payments menu. 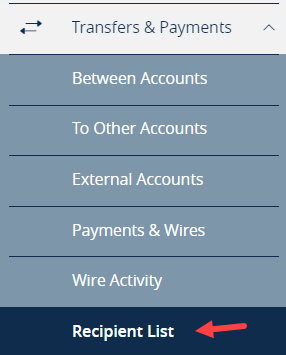
Step 2: Click on “New Recipient”
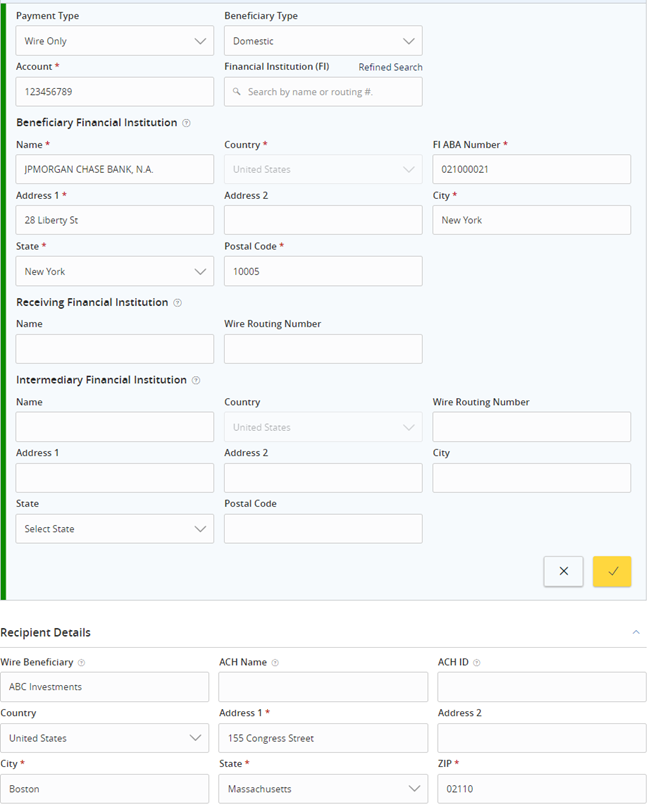
Step 3: Complete the required fields for the recipient. If there are multiple banks, complete the Intermediary/Receiving FI information if applicable. Required fields include:
- Display Name – Name of the Recipient. Note: this name will be sent with the wire if the Recipient Details section is not completed at the bottom of the screen.
- Payment Type - Wire
- Beneficiary Type – Domestic or International
- Account number of the recipient
- Search for and select the appropriate Financial Institution. The information will autofill for the Beneficiary Financial Institution fields.
- It is recommended to also complete the Recipient Details section. Although not required, this information helps with timely and accurate processing of the wire transfer.
Note: For all International Wires, Intermediary Financial institution name with routing number, and Recipient Details including name and street address are required.

Step 4: Save the recipient by clicking on “Save Recipient” at the bottom.
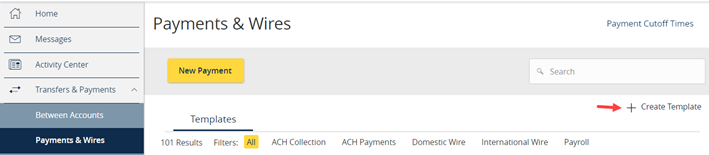
Step 5: Select “Payments & Wires” under the Transfers & Payments menu. Then click on “Create Template”.
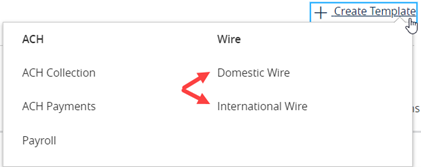
Step 6: Select the appropriate wire type, Domestic or International.
Step 7: Name the Template. 
Step 8: Search to find the Recipient you just created and select it.
Step 9: Select the Subsidiary (designated sender name that matched with the funding account) and the SVB Account number to wire out from. Amount can be entered but is not a required field when setting up a template.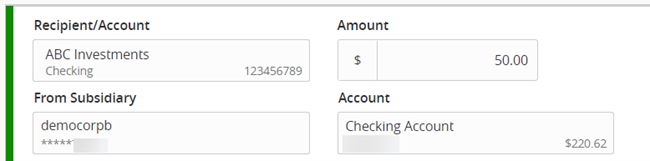
Step 10: To open the additional fields for adding special instructions click on “OPTIONAL WIRE INFORMATION”. 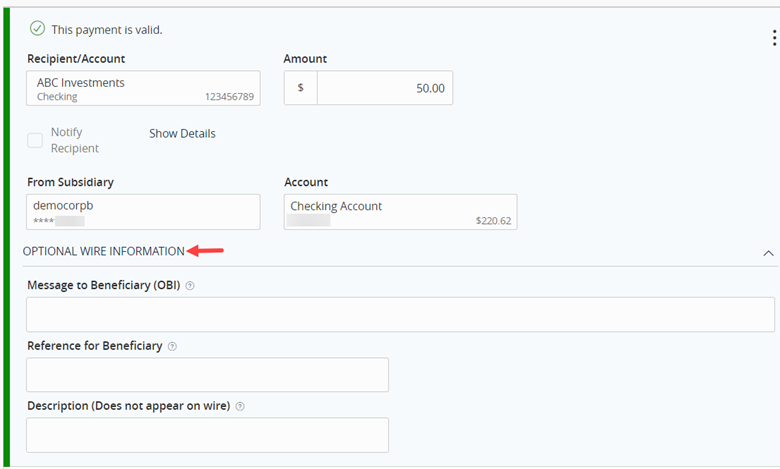
Step 11: Enter the special instructions in the Message to Beneficiary (OBI) field. This field has a maximum of 140 characters. If more characters are needed, additional information may be added to the Reference to Beneficiary field. This field has a maximum of 16 characters. See example below: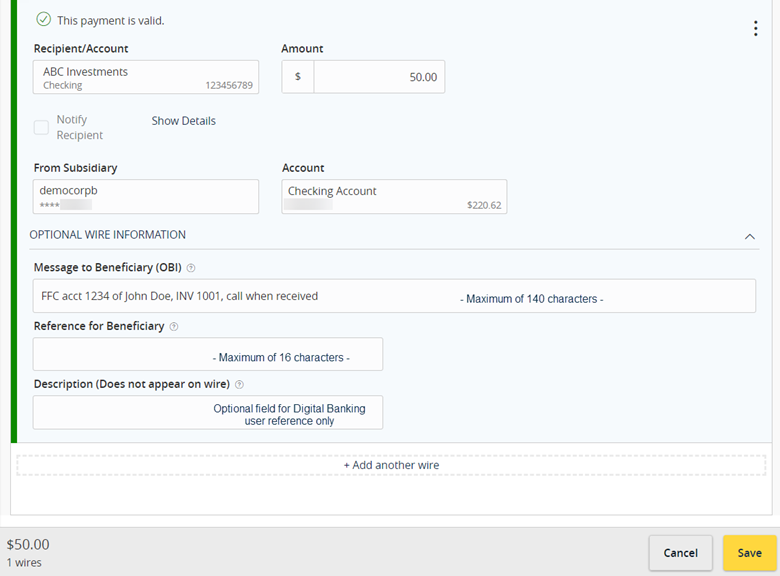
Step 12: Click “Save” at the bottom to save the template. A confirmation message will appear and allows you to either close out by clicking on “Close” or immediately utilize the template to make a payment by selecting “Pay”.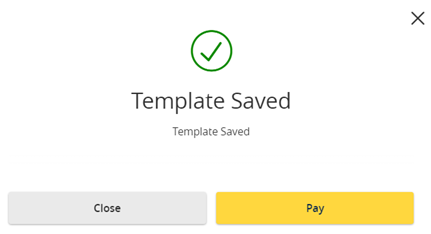
Step 13: To send a wire using the template, select “Payments & Wires” under the Transfers & Payments menu, then click on the transaction type under Templates.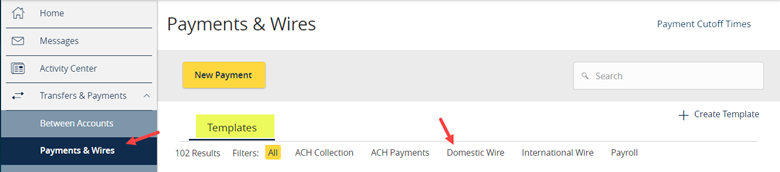
You can search for your template by typing into the search field at the top.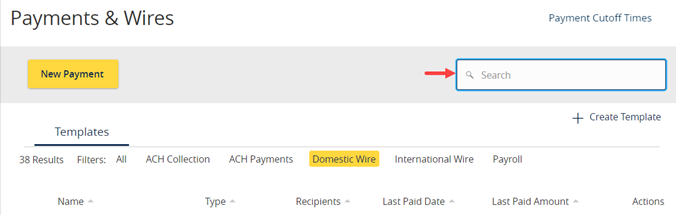
Step 14: Click on the template actions menu and select “Pay” to draft a wire utilizing the template. There is also the option in the dropdown to edit the template if any instructions need to be updated.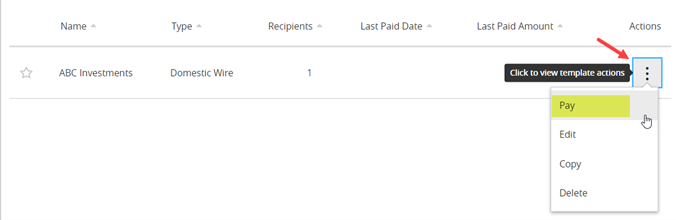
The full details of the recipient and any special instructions can be viewed by clicking on the payment actions menu and selecting “Show Details”.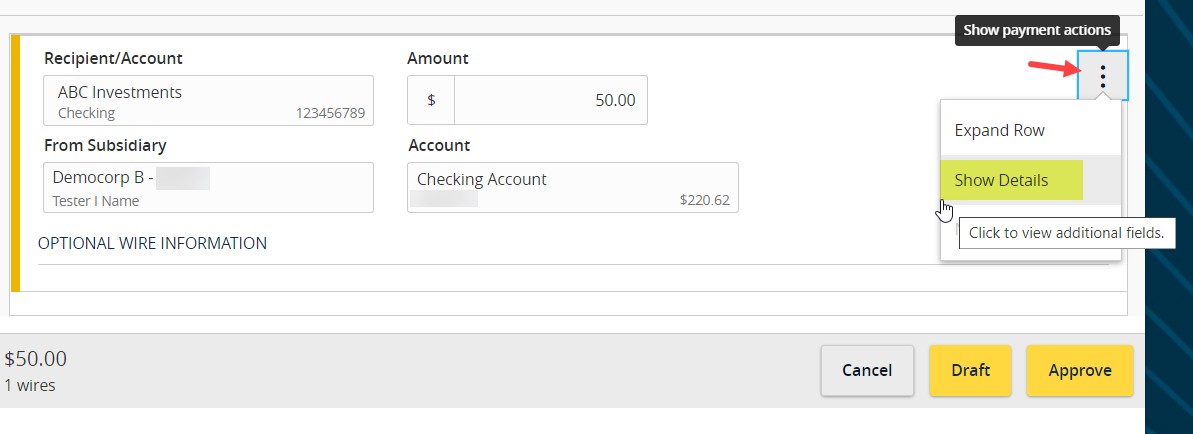
For additional questions and help, please call our Concierge Desk at (888) 322-2120.