| This article applies to Private Client Edition only. |
Want to enable another user for Digital Banking access on your accounts? The instructions below guide you through setting up a user and entitling them for the features you want them to have access to.
Adding the User Profile
Step 1: Select Administration from the side menu, then click “Manage Users”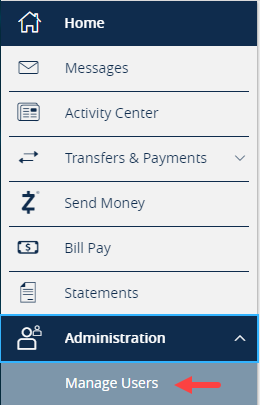
Step 2: To add a new user, click on "Add User" in the upper right corner. If managing a current user, on the User Details screen select the pencil icon next to the user and click "Assign Rights".

Step 3: Complete the user form.
Personal Details include:
- First Name
- Last Name
- Email Address – note: this will be utilized to deliver a Secure Access Code at first login
- Phone Country
- Phone
Login Details include:
- Username
- Password
- Confirm Password
When all fields are completed, click "Save New User Details"
Assigning Rights
There are three tabs in the Assigning Rights section: Transactions, Features and Accounts. First work through each transaction type assigning the appropriate entitlements, then enable the Features and Accounts. Transaction types include: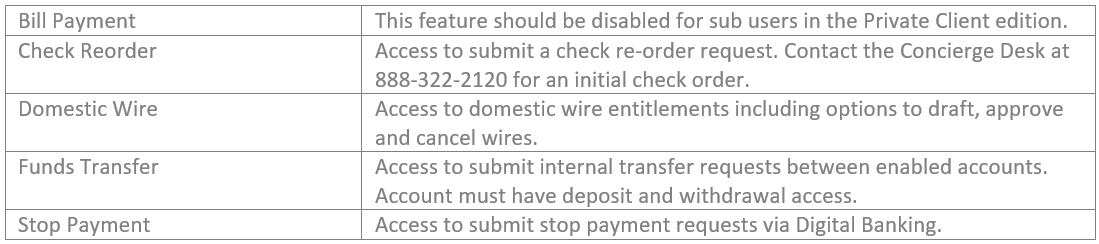
Step 1: Transaction Entitlements
a. Enablement - Each transaction type will have a toggle to Enable or Disable it.
b. Rights - In the Rights section, select entitlements for that transaction type.
- Draft: Schedule transaction for approval to process
- Approve: Approve transactions scheduled by other users
- Cancel: Cancel transactions
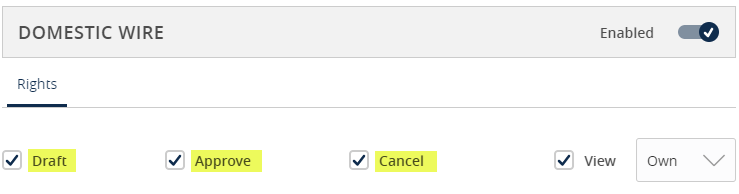
-View = Click on the dropdown next to View to establish the necessary view rights for Digital Banking originated transactions. This applies to the Activity Center screen. Note: even if the user does not have access to draft, approve, or cancel a transaction type, they may still be enabled to view it in the Activity Center based on the selection made in this View rights section.
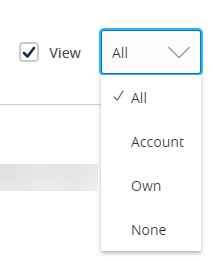
- All: can view all transactions created by all Digital Banking users on the profile
- Account: can only view transactions for accounts the user has access to view
- Own: can only view own transactions
- None: cannot view any transactions
Important – if setting up one user to create a wire and another to approve, the users who are approving must be given either All or Account for View rights.
c. Approval Limits can be set for Maximum Amount and Maximum Count by Per Transactions, Daily Per Account, Daily and Monthly. The Per Transaction amount displays on the Transaction Tile.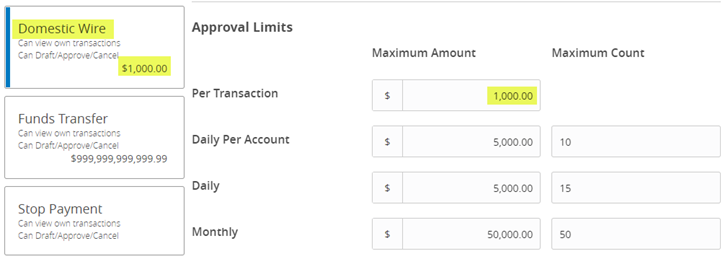
Step 2: Features
Enable all features the sub user should have access to by selecting the toggle.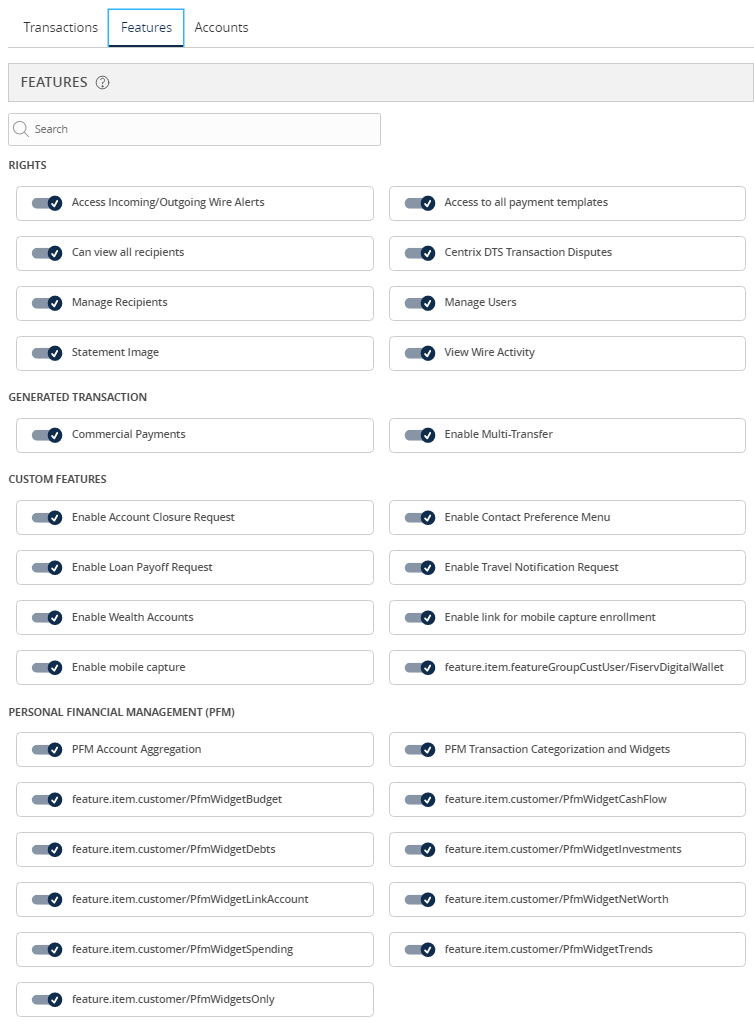
Feature Descriptions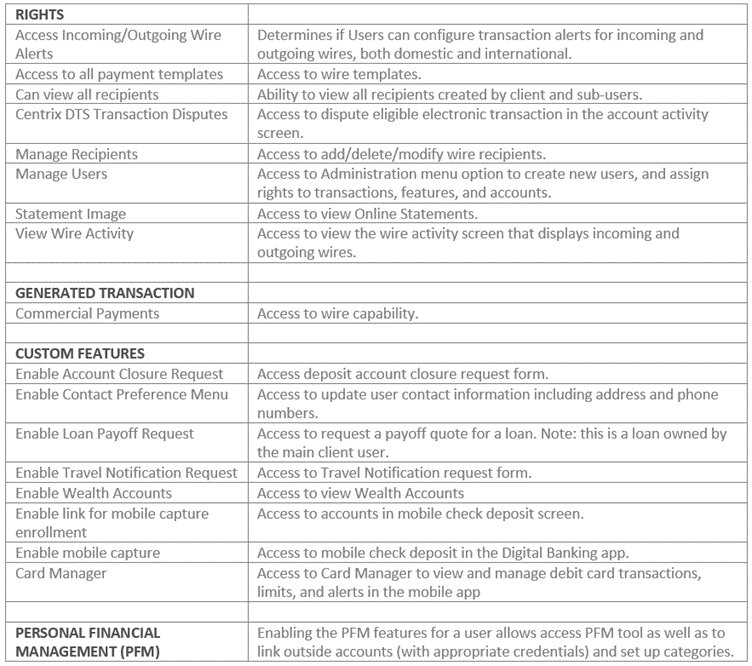
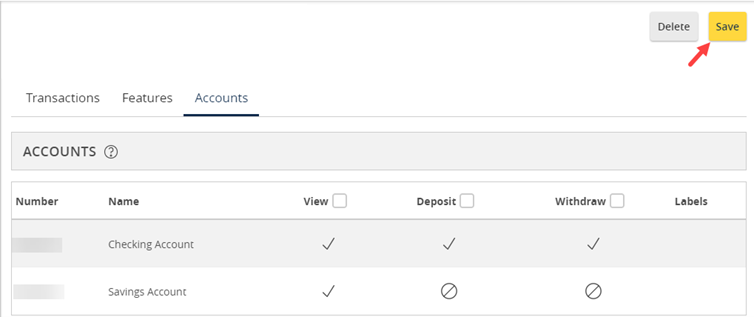
Step 3: Accounts
Designate the user’s account rights.
- Circle forward slash symbol: Access is disabled, but can be enabled
- Check mark symbol: Access is enabled
Select Show/Hide unassigned accounts to make additional selections (if applicable). Select from options of View, Deposit, and Withdraw. Note: a user must have View and Withdraw access to create/approve wires. User must have Deposit access for mobile check deposit capability. Click the Save button to record the setup.

For additional questions and help, please call our Concierge Desk at (888) 322-2120.