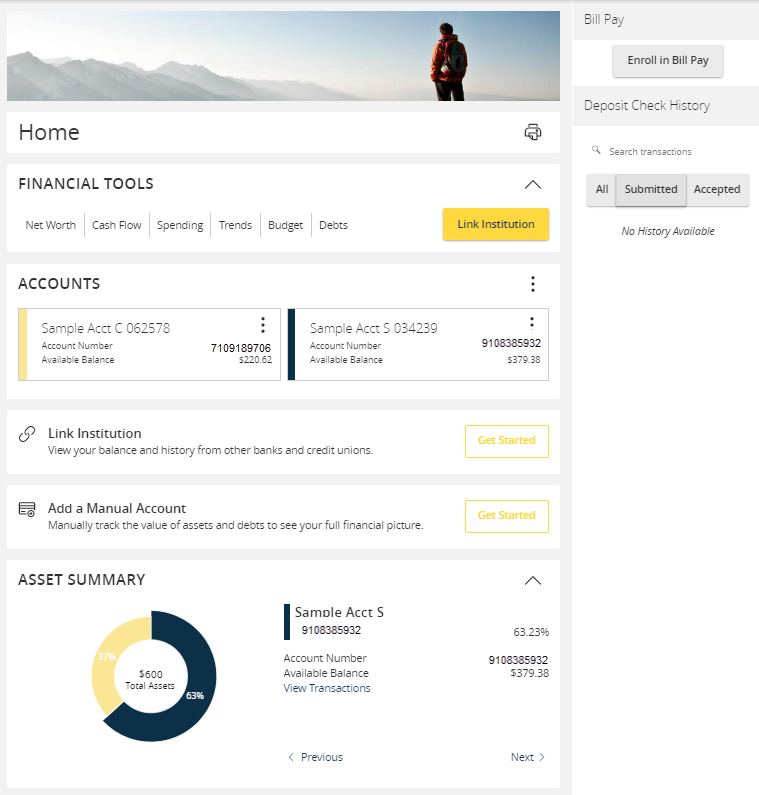
- View a listing of accounts accessible within Digital Banking.
- Shortcuts to ‘Bill Pay’ and ‘Deposit Check History’ are located on the right side of the screen.
- Click the ‘Link Institution’ button to pull in information from your other bank or credit union accounts.
- Select the Personal Finance Manager Tools to manage your finances.
- Net Worth
- Budget
- Spending
- Trends
- Debts
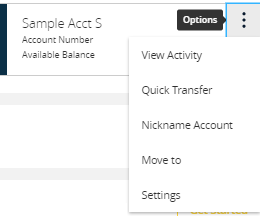
- Select the ‘Options’ icon next to each account to reveal multiple available quick actions.
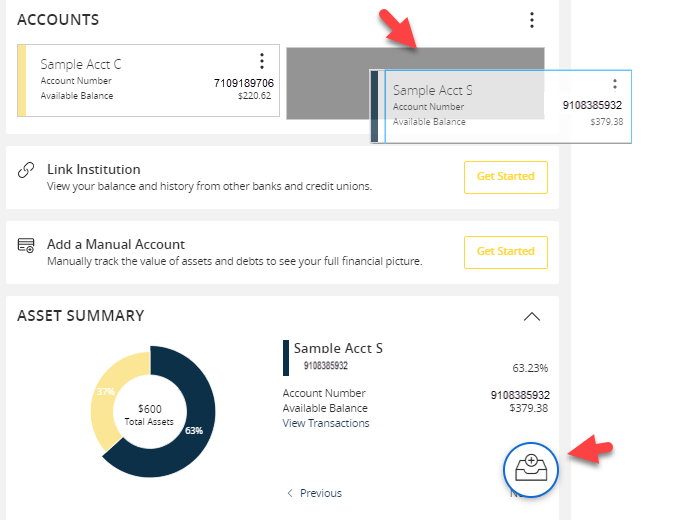
- Select and drag any account to the envelope icon which appears at the bottom right side of the screen to create a new account group.
- The new group created can be renamed by entering the name in the New Group field, and select the check mark icon to save. Additional accounts may be dragged into the new group or additional groups created.
NOTE: Additional account(s) may be moved into the newly created group or additional group(s) may be created if needed by repeating step 6.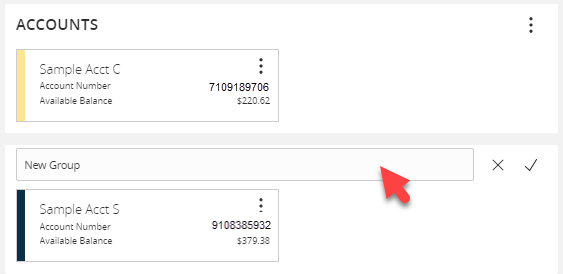
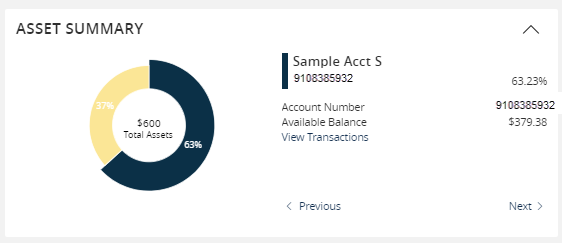
- Click on the pie graph at the bottom of the screen to view a distribution of funds across accounts accessible within Digital Banking.
Find anything about our product, search our documentation, and more. Enter a query in the search input above, and results will be displayed as you type.
Searching... 
Resource center
Resource Categories
Home screen overview
08/22/19Additional Resources
Digital Banking end-user system requirements
Resource Library Category (Digital Banking - Getting Started)
Get an understanding of the supported browsers and devices needed to use Digital Banking features.
Enabling push notifications in digital banking
Resource Library Category (Digital Banking - Getting Started)
Instructions for enabling and disabling Push Notifications, including FAQs about Push Notifications.
Managing digital banking alerts
Resource Library Category (Digital Banking - Getting Started)
Learn the basics of setting up user-level alerts for low balance, check clearance or executed transactions.