| ACH payments are only available in corporate edition of digital banking |
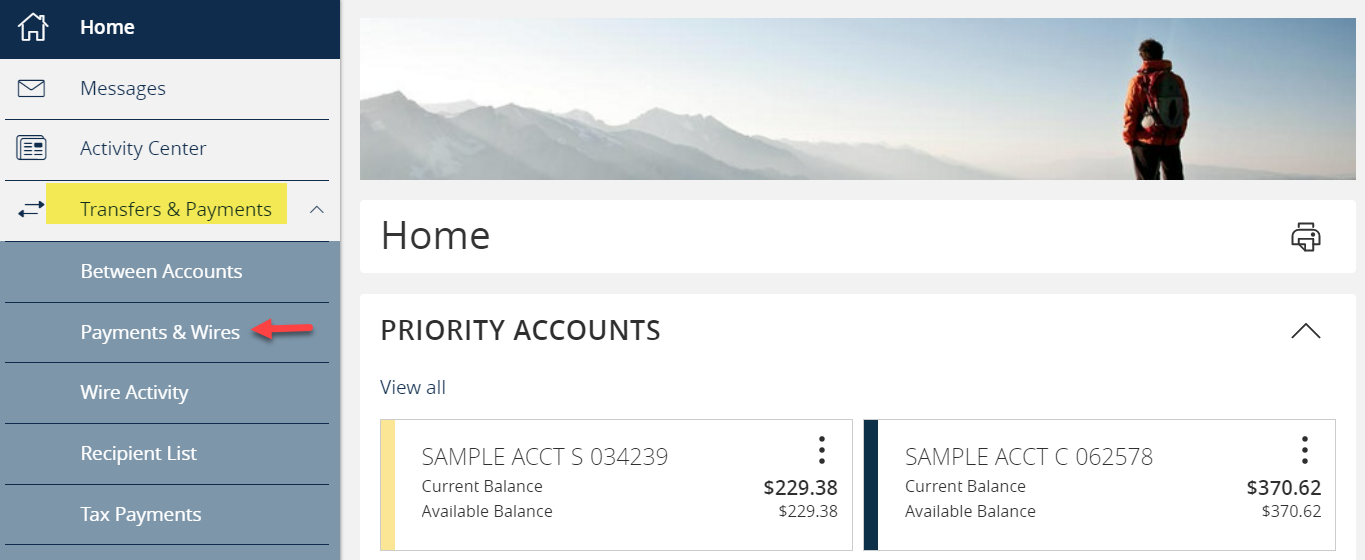
- Select the ’Transfers & Payments’ menu and then ‘Payments & Wires’.
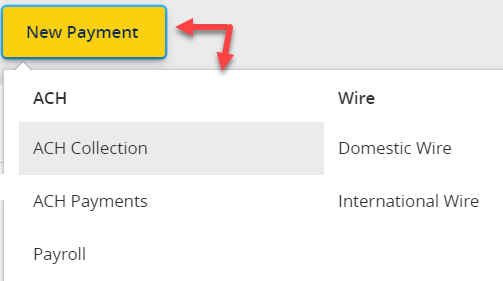
- Select the desired transaction type within the ‘New Payment’ drop down menu.
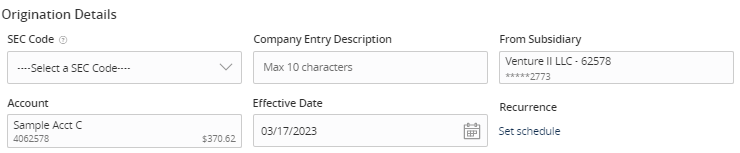
- Select the desired ACH Class Code.
NOTE: Payroll transactions will automatically default to an ACH Class Code of PPD. - Select the ‘From Subsidiary’.
- Select the offset ‘Account’.
- Select the ‘Effective Date’.
- Optional: Click ‘Set schedule’ to set up the wires as recurring transactions.
- Select how often the transaction should repeat.
- Designate when the transaction should stop.
- Click the ‘Forever (Until I cancel)’ to setup an indefinite recurrence.
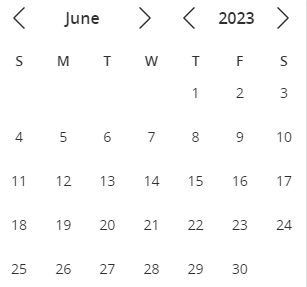
- Click the calendar and select a date to designate a specific date to stop the recurrence.
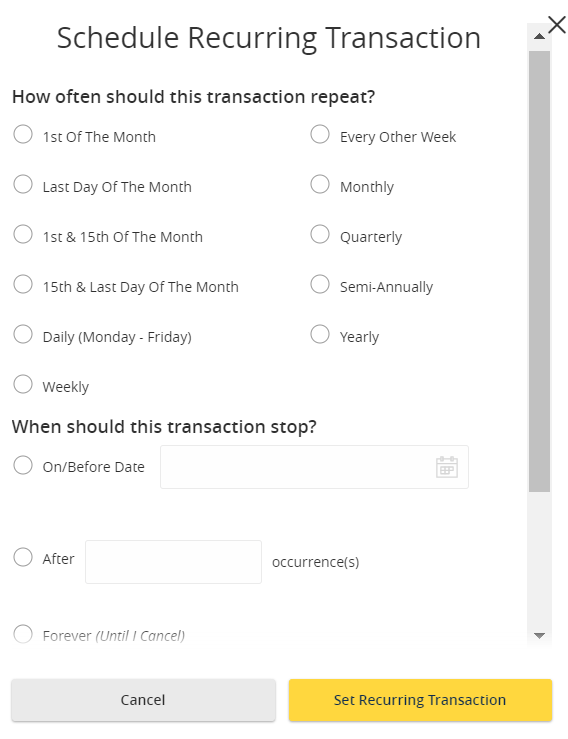
- Click ‘Save’ to save the recurrence setup.
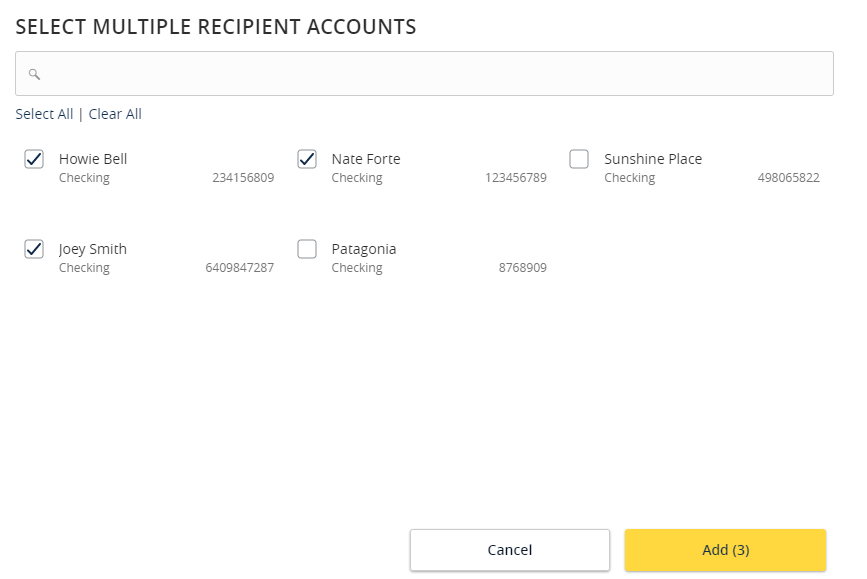
- Click the ‘+Add multiple recipients’ link to select multiple recipients at one time.

- Select the desired recipients and click ‘Add’ when done.
- Click the ‘+Add another recipient’ link to add an individual wire transfer.
- Select an existing recipient from the drop- down menu or select ‘+New Recipient’ to create a new recipient.
NOTE: Reference the ‘Recipient Management’ setup document for information regarding the setup of a new recipient.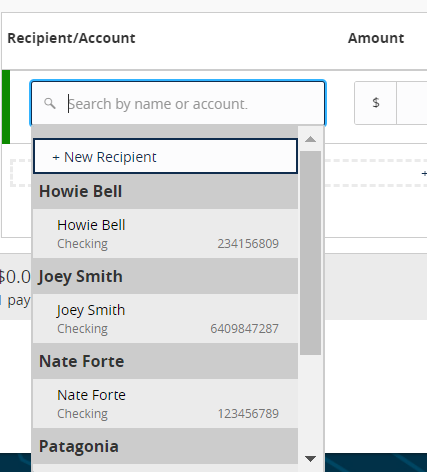
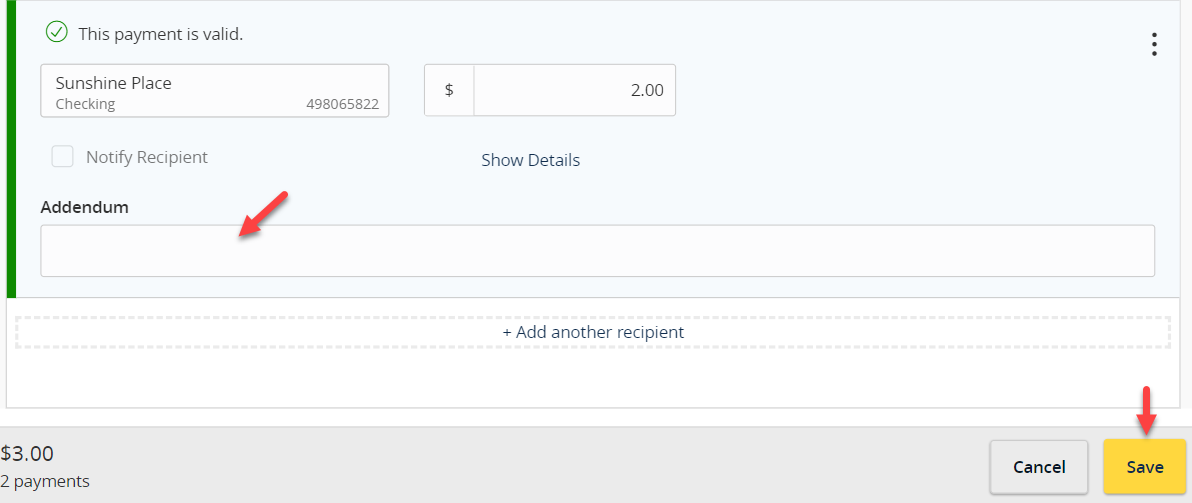
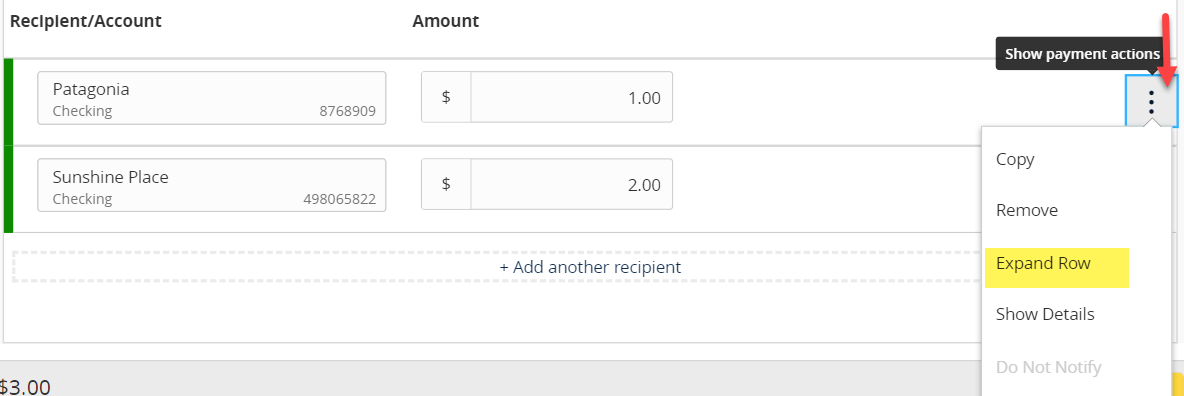
- Expand Row to add additional information to Addenda field.
- Review the information on the screen for accuracy and then select ‘Approve’ to authorize the wires or ‘Draft’ to only draft the wires that another user may approve. Learn more about payment approval.