| This features only available in Corporate Edition of Digital Banking. |
-
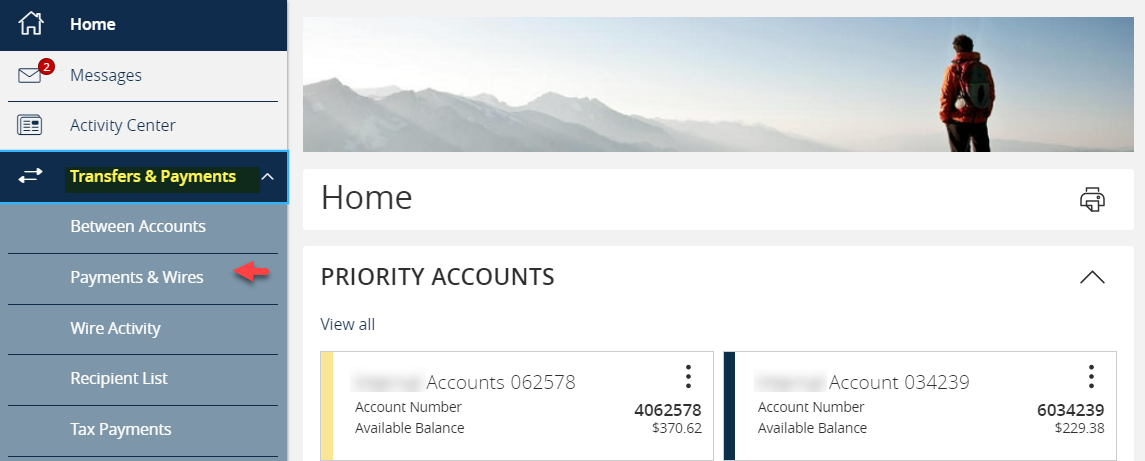
- Select the ‘Transfers & Payments’ menu and then select ‘Payments & Wires’.
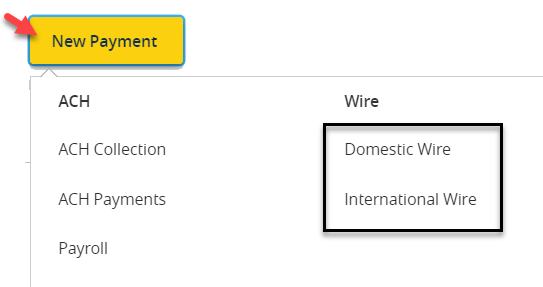
- Select ‘New Payment’ and then ‘Domestic Wire’ or ‘International Wire’ from the drop-down menu.
- Select the check box next to ‘Use same Subsidiary for all wires’ if the same subsidiary will be needed for all wire transfers.
- Select the check box next to ‘Use same Account for all wires’ if the same offset account will be needed for all wire transfers.
- Select the check box next to ‘Use same Date for all wires’ if all wire transfers need to be processed on the same date.
NOTE: Subsidiary, Account and Date can be individually selected for each wire by leaving the corresponding check box unchecked.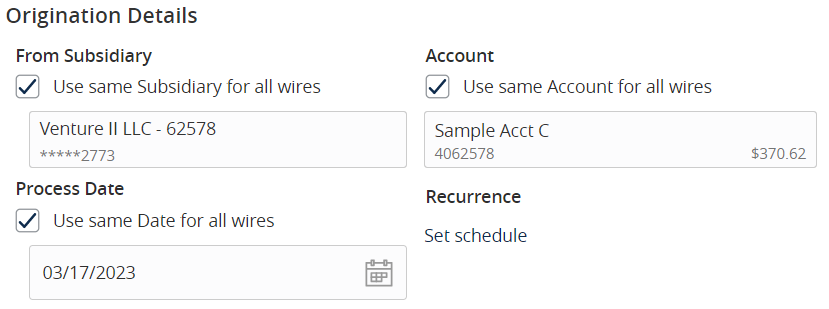
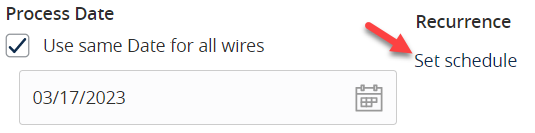
- Optional: Click ‘Set schedule’ to set up the wires as recurring transactions.
- Select how often the transaction should repeat.
- Designate when the transaction should stop.
- Click the calendar and select a date to designate a specific date to stop the recurrence.
- Click "After" and enter the number of occurrences.
- Click the "Forever (Until I cancel)" to setup an indefinite recurrence.
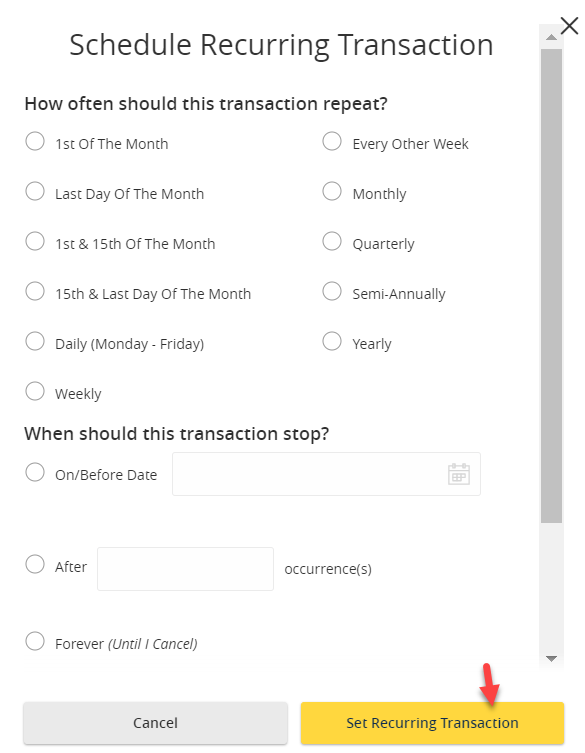
- Click "Set Recurring Transaction" to save the recurrence setup.
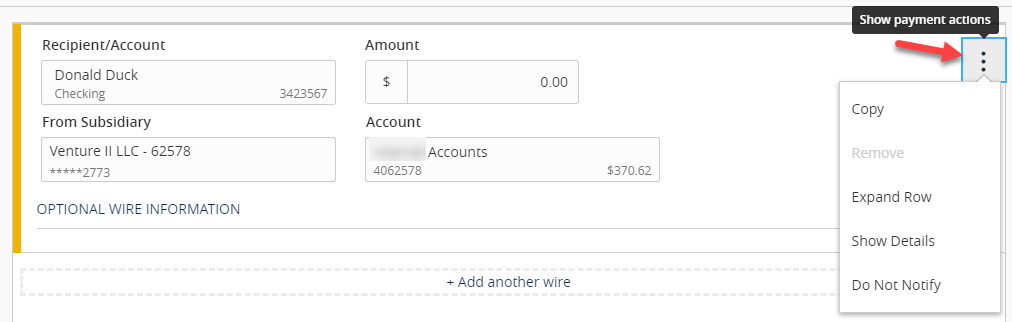
- Click the ‘Show payment actions’ icon next to each wire transfer to display available action options.
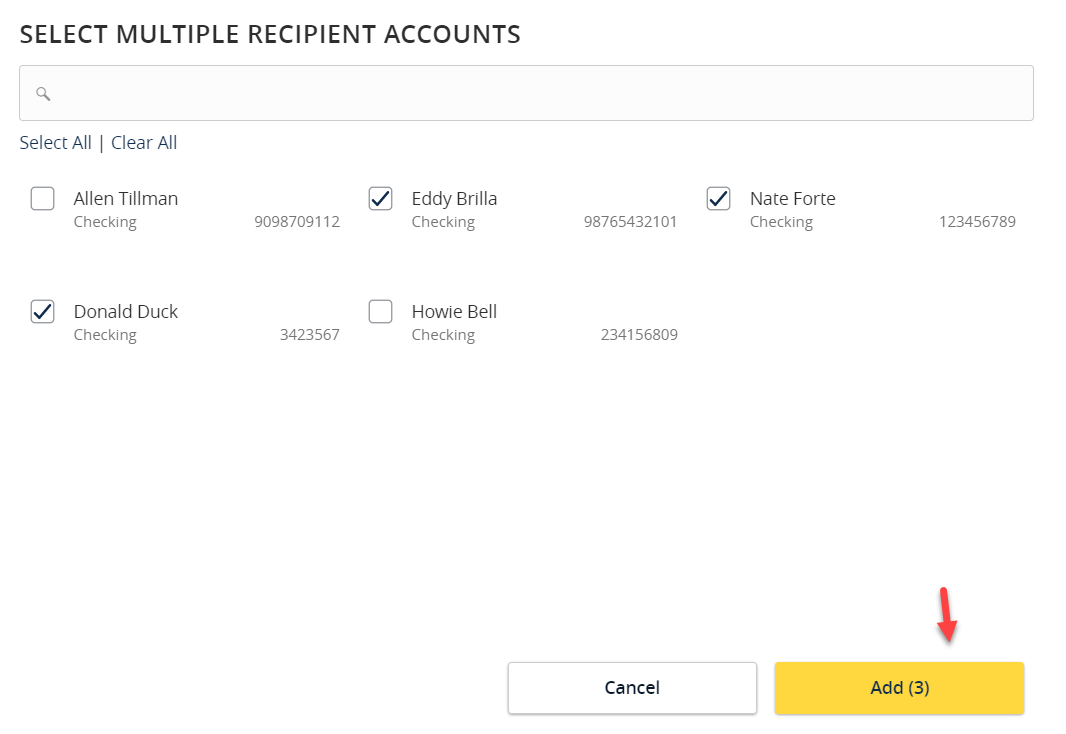
- Click the ‘+Add multiple recipients’ link to select multiple recipients at one time.

- Select the desired recipients and click ‘Add’ when done.
- Click the ‘+Add another wire’ link to add an individual wire transfer.
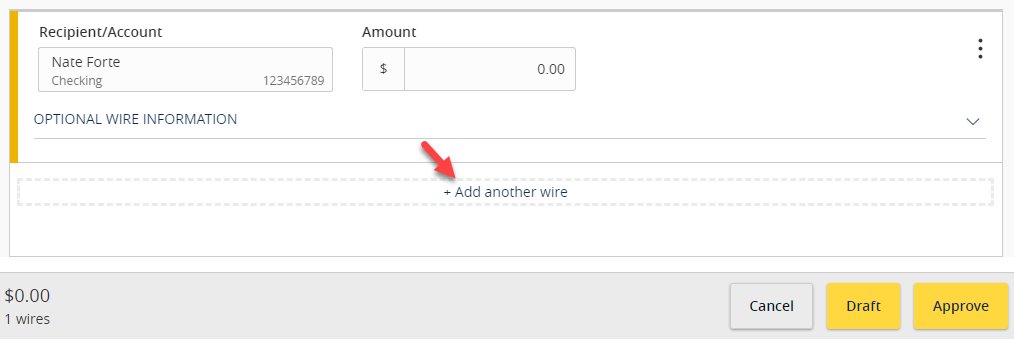
- Select an existing recipient from the drop- down menu or select ‘+New Recipient’ to create a new recipient.
NOTE: Reference the Recipient Management’ setup document for information regarding the setup of a new recipient.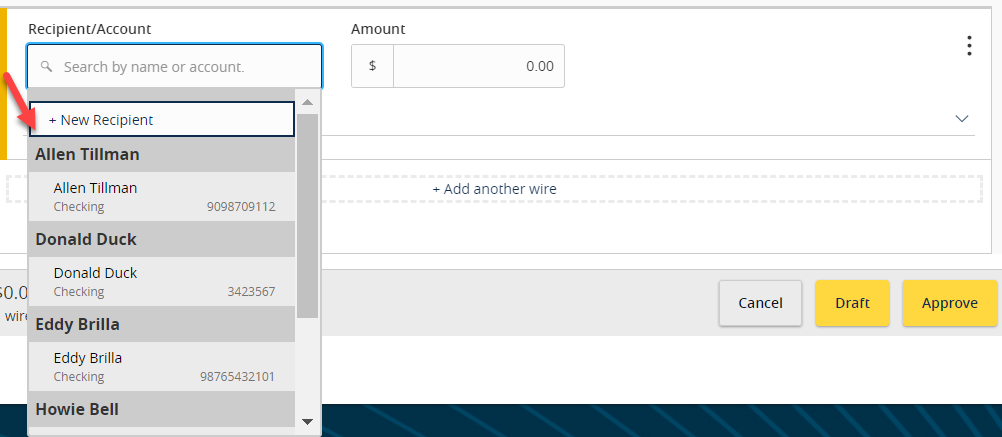
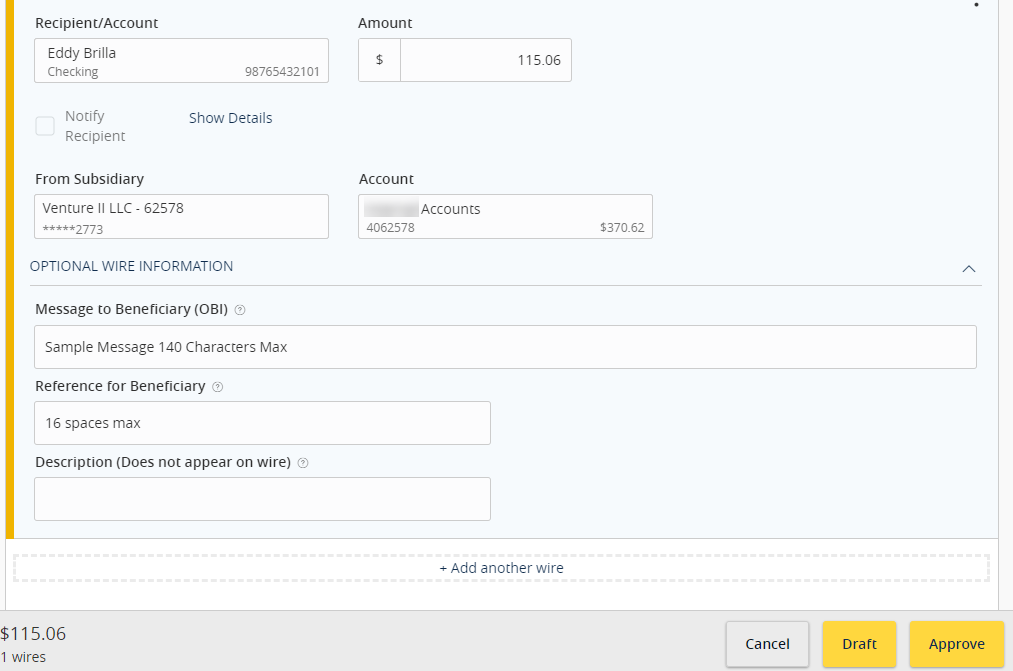
NOTE: The yellow bar on the left of the table will turn green for each wire transfer once all required fields have been entered. - Review the information on the screen for accuracy and then select ‘Approve’ to authorize the wires or ‘Draft’ to only draft them.
- Select the ‘Transfers & Payments’ menu and then select ‘Payments & Wires’.